How to Create Thumbnail Images Using Face Detection with Cloudinary
Creating a gallery of images on a page can be trivial, but what if you don’t have control over how the images are created? Ending up with different sizes and formats can turn a good looking gallery into a mess. Instead, we can use Cloudinary image transformations and Face Detection to make sure we’re always optimally showing our media.
What is Cloudinary?
Cloudinary is a media platform that has a wide variety of features to host, manage, and deliver images and videos.
Part of that feature set includes being able to transform those images and videos, such as being able to resize, optimize, and crop them.
The issue with cropping though is it can be tricky depending on how much control over your images you have. You need to be confident that all images follow a typical layout, otherwise you may end up with awkward cropping or even cropping people out of an image unintentionally.
What is Face Detection?
Instead of cropping and hoping for the best, we can intelligently crop out images using Face Detection.
Cloudinary can determine if there’s a face in the image, figure out the coordinates of that face, and make sure the crop is focused on that location.
This is perfect if for instance, we have a gallery of people where we might not have much control (or no control) over the composition of those images.
What are we going to build?
We’re going to use Cloudinary to create thumbnails of our images that automatically crop based on where someone’s face is detected in that image.
To do this, we’ll use a demo Next.js app I created that has some sample content from the Stranger Things Wiki including a small image gallery with names.
Then, we’ll take advantage of the cloudinary-build-url package to configure our Cloudinary transformations and apply them to our images.
In order to follow along you’ll need a free Cloudinary account.
Disclaimer: I work for Cloudinary as a Developer Experience Engineer.
Step 0: Creating a new Next.js app from a demo starter
We’re going to start off with a new Next.js app using a Stranger Things Wiki demo I created.
Inside of your terminal, run:
yarn create next-app my-stranger-wiki -e https://github.com/colbyfayock/demo-stranger-things-wiki
# or
npx create-next-app my-stranger-wiki -e https://github.com/colbyfayock/demo-stranger-things-wiki
Note: feel free to use a different value than
my-stranger-wikias your project name!
Once installation has finished, you can navigate to that directory and start up your development server:
cd my-stranger-wiki

yarn dev
# or
npm run dev
And once loaded, you should now be able to open up your new app at http://localhost:3000!

Step 1: Installing and configuring Cloudinary Build URL from npm
The way that the Cloudinary image API works is it allows us to construct URLs with configured parameters allowing us to specify what settings or transformations we’d like to use.
https://res.cloudinary.com/demo/image/upload/c_crop,h_200,w_300/sample.jpgIn the above, this link from the Transformations demo is using the Crop feature along with a specified width and height. Cloudinary takes the original image, performs those transformations, and delivers the final image to the browser.
While we can do this manually using the URL like above, it can be a little tedious to manage all of the different settings in a long string. Instead, we can use Cloudinary Build URL to configure our URL right in JavaScript.
To get started, let’s install Cloudinary Build URL:
yarn add cloudinary-build-url
# or
npm install cloudinary-build-url
Next, we want to import our new dependencies into our application.
At the top of our homepage in pages/index.js add:
import { setConfig, buildImageUrl } from 'cloudinary-build-url'Using setConfig we’ll be able to configure our Cloudinary account and using buildImageUrl we’ll be able to construct our image URL by passing in parameters.
To configure our account, we’ll need to make sure we have our Cloudinary Cloud Name.
Once logged into Cloudinary, you can find your Cloud Name right on the dashboard.

Note: Using my Cloud Name in the image above won’t work, you’ll need to make sure you use your own for the remainder of the tutorial!
Now with our Cloud Name, right above the Home function declaration let’s use setConfig to specify that Cloud Name:
setConfig({
  cloudName: '[Your Cloud Name]'
});
And next, we’ll be able to now use the buildImageUrl function to create our images!
Step 2: Hosting external image links from the Cloudinary CDN
In the app we just set up, we’re currently serving our images from imgur.com which is just a basic way for us to have our images publicly available, but we want to be able to take advantage of Cloudinary.
Tip: you don’t need to have your images already externally hosted to use Cloudinary, you can simply upload your images directly to Cloudinary’s asset manager!
In Step 3, we’ll get to how we can use Cloudinary to transform our images, but before we get there, we simply benefit from serving our images from Cloudinary such as automated Image Optimization.
Note: typically you need to pass in parameters for specific optimizations, but Cloudinary Build URL appends a few by default!
So to start, let’s simply configure each of our images to be served from Cloudinary.
Inside of our map statement which is looping through all of our characters, add the following before the return statement:
const image = buildImageUrl(character.image, {
  cloud: {
    storageType: 'fetch'
  }
});
console.log(image);
Here we’re passing in our character’s image URL along with a storage type of “fetch” which is telling Cloudinary we want it to download our external image and serve it from the Cloudinary CDN.
If we look our browser’s web console, we should see a few URLs logged out.

You should notice all of the URLs are from Cloudinary, and if we open any of them, it should look exactly the same at this point!
Now we can swap those image URLs into our UI.
Update the image tag to use our new image variable:
<img width="280" src={image} alt={character.title} />If we look in the browser again, we should still notice no changes.

The cool thing though, is we’re getting those mentioned optimizations out of the box, including converting those images to a better image compression method such as AVIF if your browser supports it!
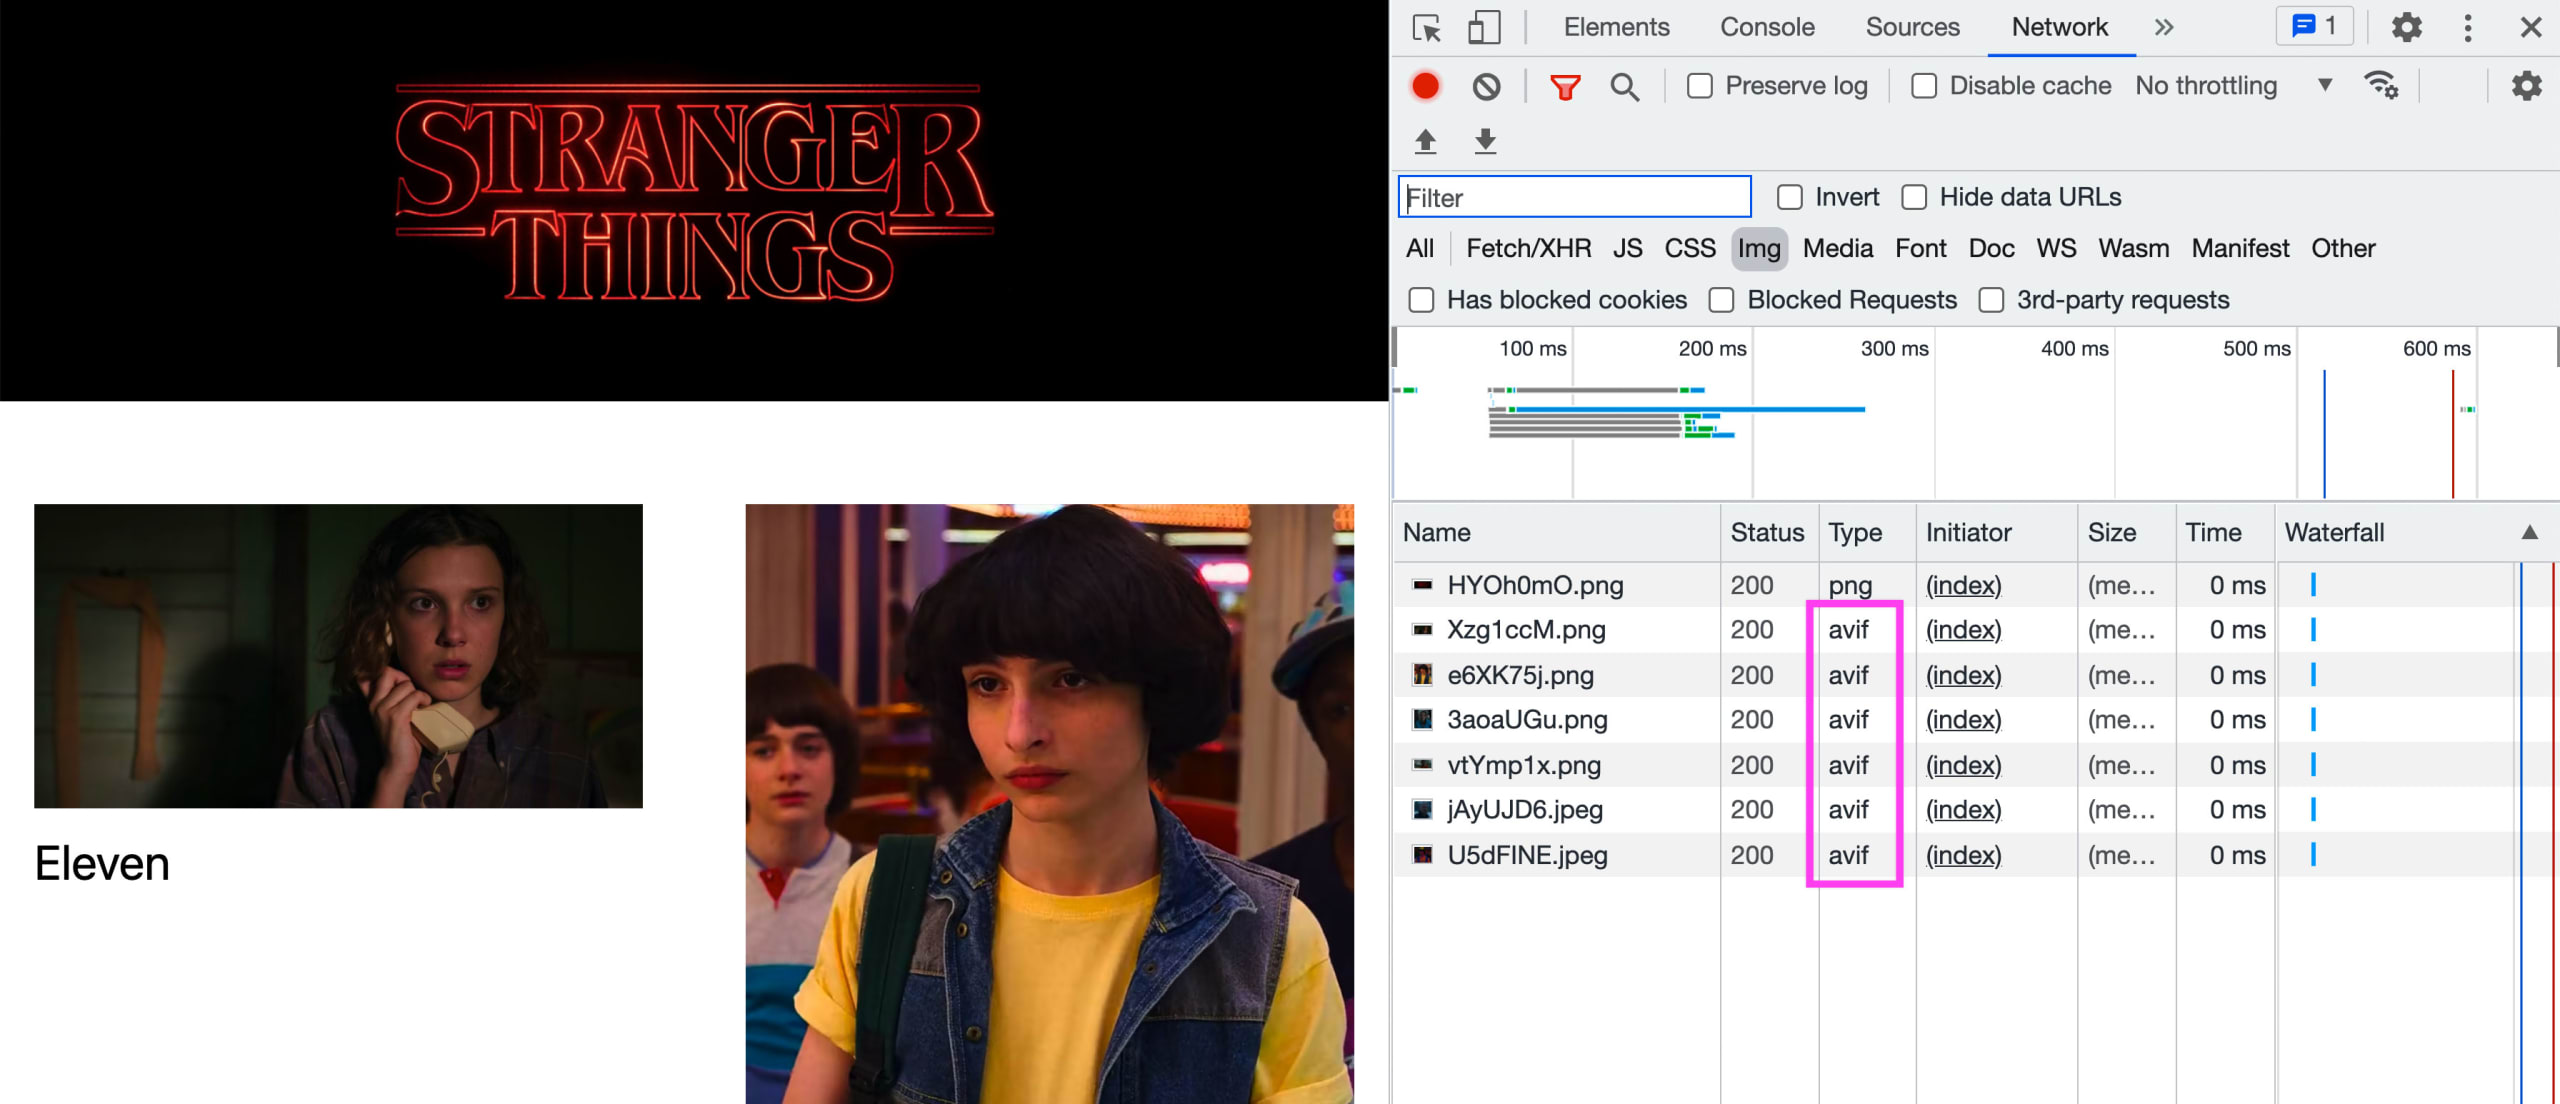
This will help our images load faster for our visitors!
Next, we’ll learn how to now transform those images using Face Detection to make sure we’re always clearly showing our character’s faces.
Step 3: Automatically creating cropped thumbnails based on detected faces with Cloudinary transformations
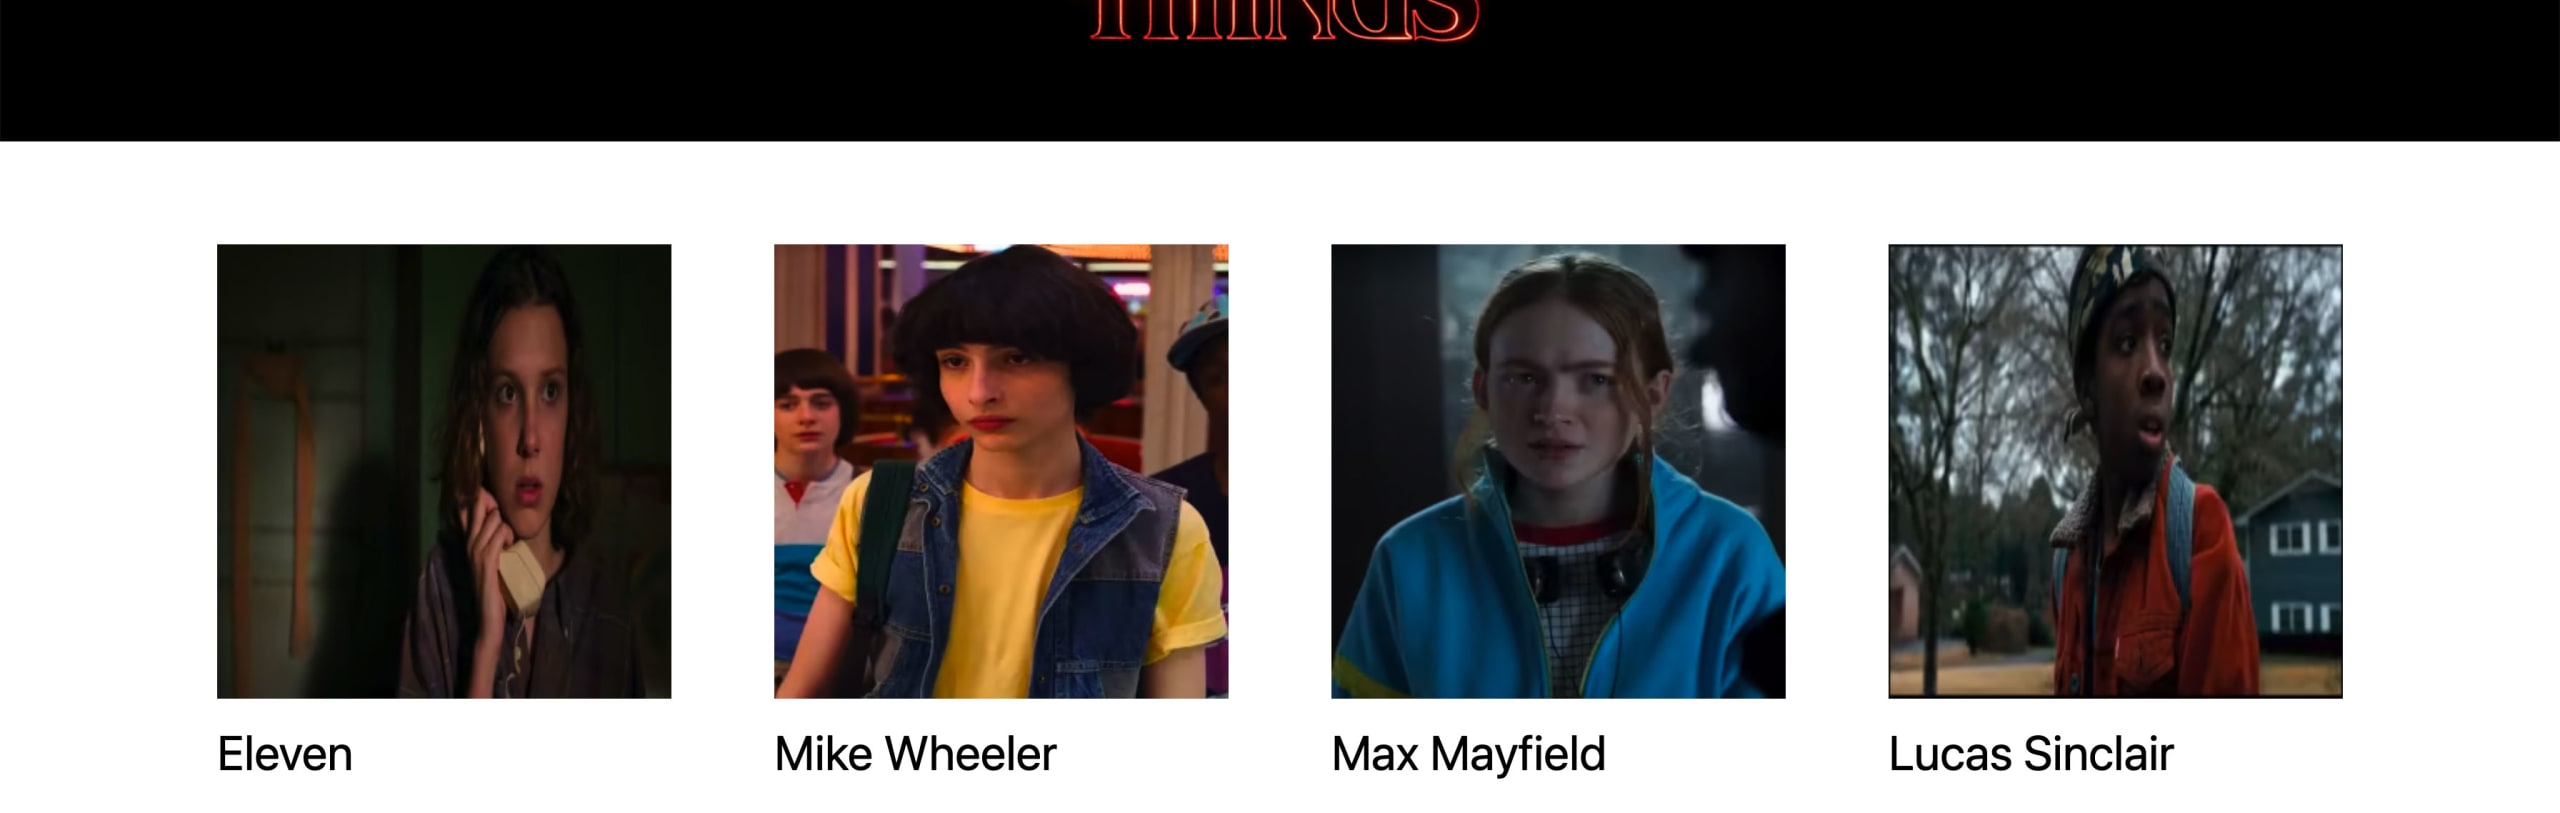
Part of the issue with our current solution is our images are coming in a variety of sizes. This makes the UI look disorganized, but it also means some of the characters appear bigger than others due to how the images are resized.
Now that we’re hooked into Cloudinary for serving our images, we can take advantage of transformations to shape our images exactly how we want.
Particularly, we’re going to do 2 things:
- Resize and crop our images to be square
- Use Face Detection to automatically center the image on the character’s face
To get started, let’s first crop our images. We can do this by creating a new transformations property in our buildImageUrl options argument, right after our cloud settings:
const image = buildImageUrl(character.image, {
  cloud: {
    storageType: 'fetch'
  },
  transformations: {
    resize: {
      width: 280,
      height: 280,
    }
  }
});
This will resize our images to a 280px square.
If we look in our browser though, we’ll notice all of our images are each a square, but they are now skewed, which isn’t a great look! ????
To fix this, we can add the fill property which will tell Cloudinary to use the image to fill the space with the right ratio.
transformations: {
  resize: {
    type: 'fill',
    width: 280,
    height: 280,
  }
}
Which works a lot better.

But another issue we see, is our character’s faces don’t seem to be consistently shown in the images. Particularly, Eleven is getting cut off!
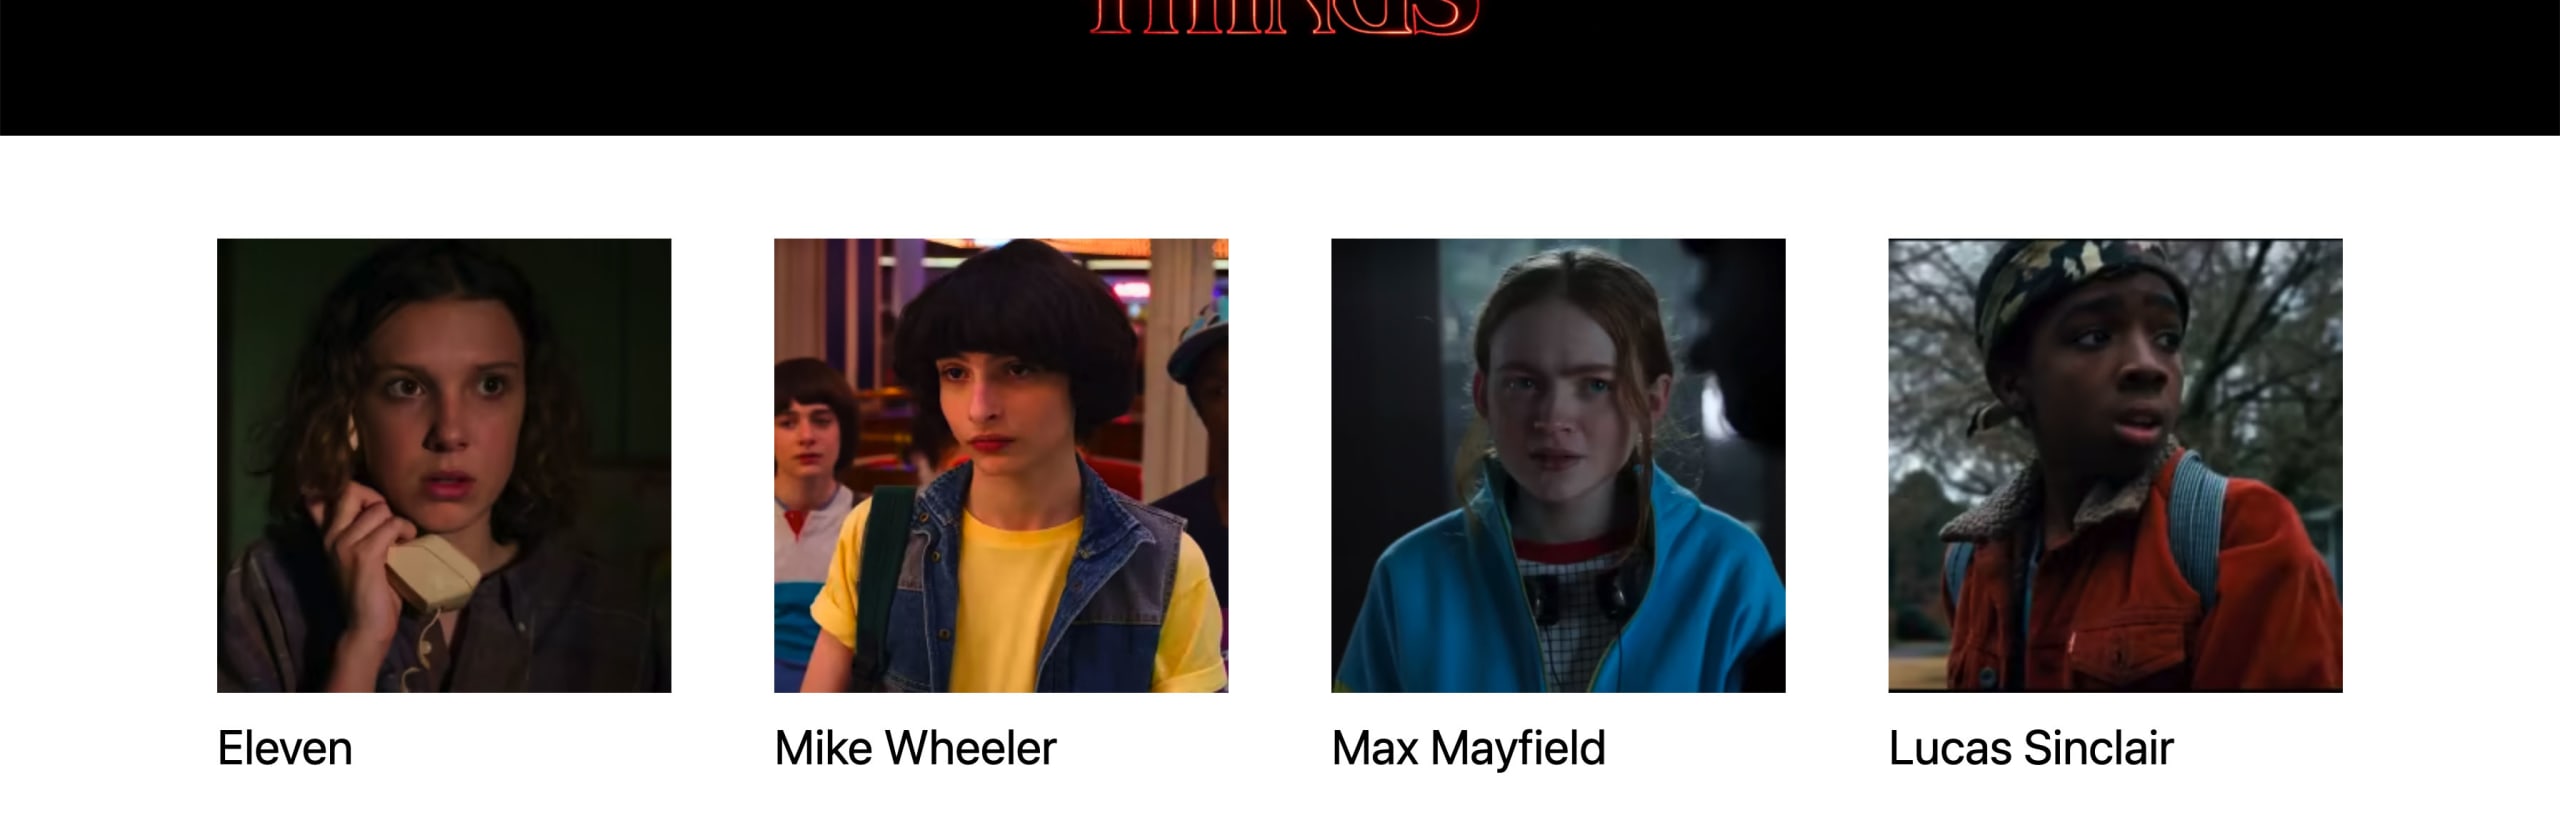
To fix this, we can use the gravity property which will allow us to tell Cloudinary to find the face in the image, then center the crop based on that face.
transformations: {
  resize: {
    type: 'fill',
    width: 280,
    height: 280,
  },
  gravity: 'face'
}
The cool thing is we can even take more control of this, where if we wanted to make sure that we’re only cropping on the face itself, to be even more consistent, we could use a different resize “type”, such as:
transformations: {
  resize: {
    type: 'thumb',
    width: 280,
    height: 280,
  },
  gravity: 'face'
}
Which will then give us a crop of the face itself in the image frame!

What else can we do?
Adjust image cropping with zoom and other transformations
We only covered a few basic transformations, but there are a wide variety of other options we can use to manage our images.
For instance, we can use the zoom transformation to control how close to the character’s face we zoom in on the thumbnail.
Image Transformations for Developers
Add dynamic text on top of images
In addition to working with the original image, we can add text on top of that image. That’s how we can do things like create dynamically generated social media images based on a page title or text.