How to Schedule Daily Email Reports with GitHub Actions, Gmail, & Cron
GitHub Actions are a great way to automate our daily code tasks, but what about that report you have to generate every day for your boss’s boss? How can we use GitHub actions and cron to generate and email a daily report?
What are GitHub Actions?
GitHub Actions are configurable tasks that run a set of instructions based on a specified trigger.
They’re controlled through YML-based files located right inside of your GitHub repository, allowing you to tell GitHub what you want to run, with which parameters, and when.
Typically this includes things like running tests when a new Pull Request is created or when code is pushed to the main branch, but GitHub additionally provides a way to provide a time-based trigger with cron so you can schedule your tasks to run instead.
What is cron?
Cron is a utility that allows tasks to be ran based on a given schedule.
Historically cron “jobs” were created and managed using “crontab” (cron table) on a server where these jobs would be configured and stored.
While the syntax can vary ever so slightly between tools, generally the format looks like the following:

The idea is you specify the interval you want your cron to run on which could be time-based, on certain days, or however you want to configure your job between the available column types.
With tools like GitHub Actions, we can use the same scheduling syntax to automate code-based tasks from our repository’s workflow file(s).
What are we going to build?
To see how we take advantage of using cron with GitHub Actions, we’re going to send a regularly scheduled email with the weather and a random gif from The Office from the Tenor API.
To send our emails, we’ll take advantage of Gmail’s free SMTP server (you can substitute this for your favorite provider) and send an email right from our action.
Once we have our basic email set up, we’ll add some details to our new report such as layering in using the AccuWeather API to grab the forecast for the current day then the Tenor API to add our gif!
Step 0: Creating a new Node.js project & script
In order to get started with our daily report, we first need to set up a new Node.js project.
To get started, let’s first create our new directory:
mkdir my-daily-report
cd my-daily-report
Then we can now initialize our new Node.js project.
In your terminal run:
npm initOnce you run the init command, node will ask you some questions about how you want to configure your project.
These fields aren’t necessarily important for our walkthrough, so feel free to hit the Enter key until you finish, otherwise you can fill out each field to the values you want.
Learn more about creating a new node project or package.json file.
Next we can create the directory structure to how we want our script to look. One way we can set this up is by maintaining our scripts in a src folder.
In the root of the project, create a new directory called src and inside the src folder, create a new file called main.js.
Now that we have main.js we can add some code to start our script.
Inside src/main.js add:
(async function run() {
  console.log('Running report...');
})();
Here we’re creating a new immediately invoked asynchronous function.
The reason we’re doing this is we can’t use async/await at the top level of our script, so we create an asynchronous function that will allow us to do so, but instead of running it manually after defining it, we just tell it to immediately invoke itself.
So now, we can test that this works by running the following command from the root of our project:
node src/main.jsAnd once it runs, we should see a simple log right inside of our terminal!

Next, we’ll start using our new script to build our report!
Note: if you’re using git to manage your report project, make sure to add a
.gitignorefile that containsnode_modulesfor when we later install packages via npm
Step 1: Sending an email in a node script with Gmail & Nodemailer
The goal of our script will be to send a daily report by email, so to get started, we’ll set up our email client.
While there are a variety of way to do this, like using SendGrid, we’re going to use popular email service Gmail, which provides a free SMTP server that we can use to send emails on our behalf.
To do this, we’re going to use the npm package nodemailer which will allow us to easily configure our mail client to send our emails.
In your terminal, install nodemailer by running:
yarn add nodemailer
# or
npm install nodemailer
Note: it doesn’t matter whether you use yarn or npm for this walkthrough, but remember to just stick with one of them!
With our package installed, we need to import it.
At the top of src/main.js add:
const nodemailer = require('nodemailer');To start using nodemailer, we need to first create a “transporter” which will include our SMTP server configuration.
Inside of our run function in src/mail.js add:
const transporter = nodemailer.createTransport({
  host: 'smtp.gmail.com',
  port: 465,
  secure: true,
  auth: {
    user: 'email@domain.com',
    pass: 'password'
  }
});
Here we can see we’re configuring a few things:
- Host: pointed to Gmail’s servers
- Port: the port we need to use for secure mail requests to Gmail
- Secure: making sure we’re using secure request method
- Auth: our username and password for Gmail
The Auth part might be tricky depending on how you have Gmail set up.
The user will always be your Gmail email address, but the password depends on if you’re using 2 Factor Authentication (2FA) or not (which you really should be using!)
If you don’t have 2FA set up, you need to first configure Gmail to allow Less secure app access, which will then allow you to use your typical password for authentication. But because I don’t recommend doing this, as it’s risky for your account, I’m not going to walk through this.
Instead if you do have 2FA set up (again which I recommend), we’ll need to create an App Password.
To do this we’ll first want to head over your Google Account page then navigate to the Security section.
Note: Google’s UI changes somewhat frequently, so the screenshots might differ, but you should be able to find the most recent version of how to generate an App Password over on Google’s docs.
Here you’ll find all of your account sign-in related information including where you can set up 2FA, but we want to scroll down to the Signing in to Google section where we’ll see the option for App passwords.

Once you navigate to this page, you’ll be asked to enter your password again, but then you’ll land on a page which will allow us to generate our password.

Here we want to first select the Mail App and then select which Device, which we’re not using any of the preselected Devices, so we can click Other where we can enter any name we want, such as Daily Report Email or whatever you’ll remember the name for.

But once you add your name, you can click Generate, where Google will show you your new App password!
Keep in mind they’ll only show you this password once, so make sure to copy it and save it before you click Done otherwise you’ll have to delete it and generate a new password.
With our new password, inside of src/main.js we can update the the auth.pass value to our new App password.
Now, with our configured transporter, we can actually send some mail!
Under transporter inside src/main.js add:
await transporter.sendMail({
  from: 'email@domain.com',
  to: 'otheremail@domain.com',
  subject: 'Daily Report',
  text: `
    Daily Report
  `,
  html: `
    <h1>Daily Report</h1>
  `,
});
Here again we have some configuration:
- From: the email address the mail is coming from, this should likely be your email used to create the transporter
- To: the email address where you want the mail to be sent from, with Gmail, it can be the same as the “from” if you’re sending it to yourself
- Subject: the subject of the email
- Text: the Plain Text version of your email body
- HTML: the HTML version of your email body
Note: sometimes mail providers don’t like sending emails “from” and “to” the same email address, so if it doesn’t work, this may be why. Try sending it to an alternative email to see if that works!
If you notice we’re basically creating our email twice with the Text and HTML versions. These two versions are used depending on the receiver’s mail preferences, as all inboxes may not receive HTML emails, but if they do, we want to provide a better experience using HTML.
With our sendMail function configured, we can now test!
Inside of your terminal, run:
node src/mail.jsIf you still have the console.log from Step 0 you should see that appear, but once the script finishes running, you should now see a new email appear in your “from” receiver’s mailbox!
Now before we move on, we don’t want to be storing our email and password to that email inside of our code, especially if we’re storing that code on Git (which we will be for GitHub Actions). This could lead to your account being compromised.
We instead want to use something like an environment variable, which will allow us to use those values, but in a way that’s not stored inside of the code.
To do this, first we want to install package dotenv which will help us load our environment variable file:
yarn add dotenv
# or
npm install dotenv
Next we can create our environment variable file. Inside the root of the project, create a file called .env and add the following:
MAIL_USER="email@domain.com"
MAIL_PASSWORD="password"
DAILY_REPORT_FROM="email@domain.com"
DAILY_REPORT_TO="otheremail@domain.com"
These values should be configured to whatever you used earlier in this step.
Inside of src/mail.js we first want to import dotenv:
require('dotenv').config();Then we can use our variables and update our transporter and mail function:
const transporter = nodemailer.createTransport({
  host: 'smtp.gmail.com',
  port: 465,
  secure: true,
  auth: {
    user: process.env.MAIL_USER,
    pass: process.env.MAIL_PASSWORD
  }
});

await transporter.sendMail({
  from: process.env.DAILY_REPORT_FROM,
  to: process.env.DAILY_REPORT_TO,
  subject: 'Daily Report',
  text: `
    Daily Report
  `,
  html: `
    <h1>Daily Report</h1>
  `,
});
Lastly, we want to make sure we add our new .env file to our .gitignore file to avoid that file being committed to our GitHub repository.
So inside .gitignore add:
.envFinally, we can test our script again:
node src/main.jsAnd we should see our email show up right inside of our inbox just like the first time!
Step 2: Automating a daily report email with GitHub Actions
Now that we have our email, we want to set it up to run every day so it hits our mailbox first thing in the morning!
Note: before moving forward here, I highly recommend you make sure you’re storing your email addresses and passwords in environment variables like we walked through in Step 1 to avoid compromising your account.
To do this, we’re going to use Github Actions, which comes in the form of a configuration file, where we can use the cron syntax to specify how often we want it to run.
Using GitHub Actions requires your code to be available inside of a GitHub repository. I won’t be walking through this process, but if you need help you can check out GitHub’s docs for Adding an existing project to GitHub using the command line.
In the root of your project, create a new directory called .github and inside create a folder called workflows.
Note: Yup, there is a
.in front of.github, make sure it’s there or else it won’t work!
Inside .github/workflows create a new file report.yaml and add:
name: Report

on:
  schedule:
    - cron: "0 14 * * *"
  workflow_dispatch:

env:
  MAIL_USER: ${{ secrets.MAIL_USER }}
  MAIL_PASSWORD: ${{ secrets.MAIL_PASSWORD }}
  DAILY_REPORT_FROM: ${{ secrets.DAILY_REPORT_FROM }}
  DAILY_REPORT_TO: ${{ secrets.DAILY_REPORT_TO }}

jobs:
  report:
    runs-on: ubuntu-latest
    steps:
      - uses: actions/checkout@v2

      - uses: actions/setup-node@v1
        with:
          node-version: 12

      - run: yarn install --frozen-lockfile

      - run: node src/main.js
Before we walk through this file, if you’re using npm instead of yarn, update the yarn install link to:
- run: npm ciInside of the report.yml file, here’s what we’re doing:
on: defines when we want our workflow to run.schedule: tells GitHub to run the action based off of a cron syntax. This is currently set to run every day at the 14th hour in the UTC timezone (or 10am EST).workflow_dispatchallows us to manually run the workflow in the UIenv: our environment variables just like we configured locally, we’ll see next that we will add these variables inside of our GitHub repositoryjobs: this is where we configure our environment to run on and run our node script!
And that’s actually all we need to configure our workflow file! So now you can go ahead and commit this code to your repository and push it out to GitHub.
Now before this can actually work, we need to additionally configure our environment variables inside of our repository.
Inside of your project, head over to Settings and then select Secrets in the left sidebar.
Once there, click New repository secret.

Creating a new Repository Secret
Here we can define our first environment variable, to to start off, you can set:
- Name: MAIL_USER
- Value: email@domain.com
These values should be what you want to use to configure where and how your email gets sent (like we did in .env).
Continue this process with all of your environment variables.

Once finished, we can now test our Action!
Navigate to the Actions tab and you should now see Report under the Workflows sidebar (this might be different if you customized the name inside of .github/workflows/report.yml).
Select the Report workflow and on the right side of the page, you should see a Run workflow button, which we can see because we configured our Action to run on workflow_dispatch.
Click Run workflow then in the dropdown again select the green Run workflow button.

After a few seconds, you’ll be able to see that you now have a workflow run that started.

This is working through the steps that we defined inside of our workflow file.
But once it’s finished and you see the green checkmark, you should now be able to go back to your email inbox and see your Daily Report email that was sent from that manual run!

From now on, that Action will run and send based on your cron that you configured in the schedule above.
Next we’ll actually add some dynamic content!
Step 3: Adding today’s weather with the AccuWeather API
For some dynamic content we’re going to start with adding the weather forecast using the AccuWeather API.
To do this we’ll need an API key which you can grab by:
- Signing up for a free developer account
- Creating new AccuWeather app
- Grabbing your app’s API key
Tip: want to see how to do this step-by-step? Check out the video version for the complete walkthrough
Before we make any requests though, we can make our lives easier by using a library to help make our requests. In our case, we’ll use node-fetch.
In your terminal run:
yarn add node-fetch@^2
# or
npm install node-fetch@^2
Note: We’re installing v2 of node-fetch for now to avoid compatibility issues for this walkthrough as v3 now requires ESM to work.
Once installed, we can import our dependency at the top of src/main.js:
const fetch = require('node-fetch');Next, similar to previous steps, we want to make sure we make our API key available as an environment variable within our project.
Inside .env add your AccuWeather API key as:
ACCUWEATHER_API_KEY="abcd1234"We also need to add this inside of our GitHub workflow file so that it’s recognized when we run it on GitHub:
env:
  ...
  ACCUWEATHER_API_KEY: ${{ secrets.ACCUWEATHER_API_KEY }}
And while we’re at it, also head over to your project’s GitHub repository and add your ACCUWEATHER_API_KEY as a secret to make sure it’s available when we try to run it.
Now with node-fetch and our API key, we can now make our requests to actually get the forecast for the area we want.
In order to do this, we need to complete two different API requests:
- Look up the Location Key of our area (we’ll use City search)
- Use the Location Key to look up the Forecast
So let’s start with the Location. While we’re going to use the City name and State narrowed down by the Country Code, you can use other searches such as by Zip or Postal Code.
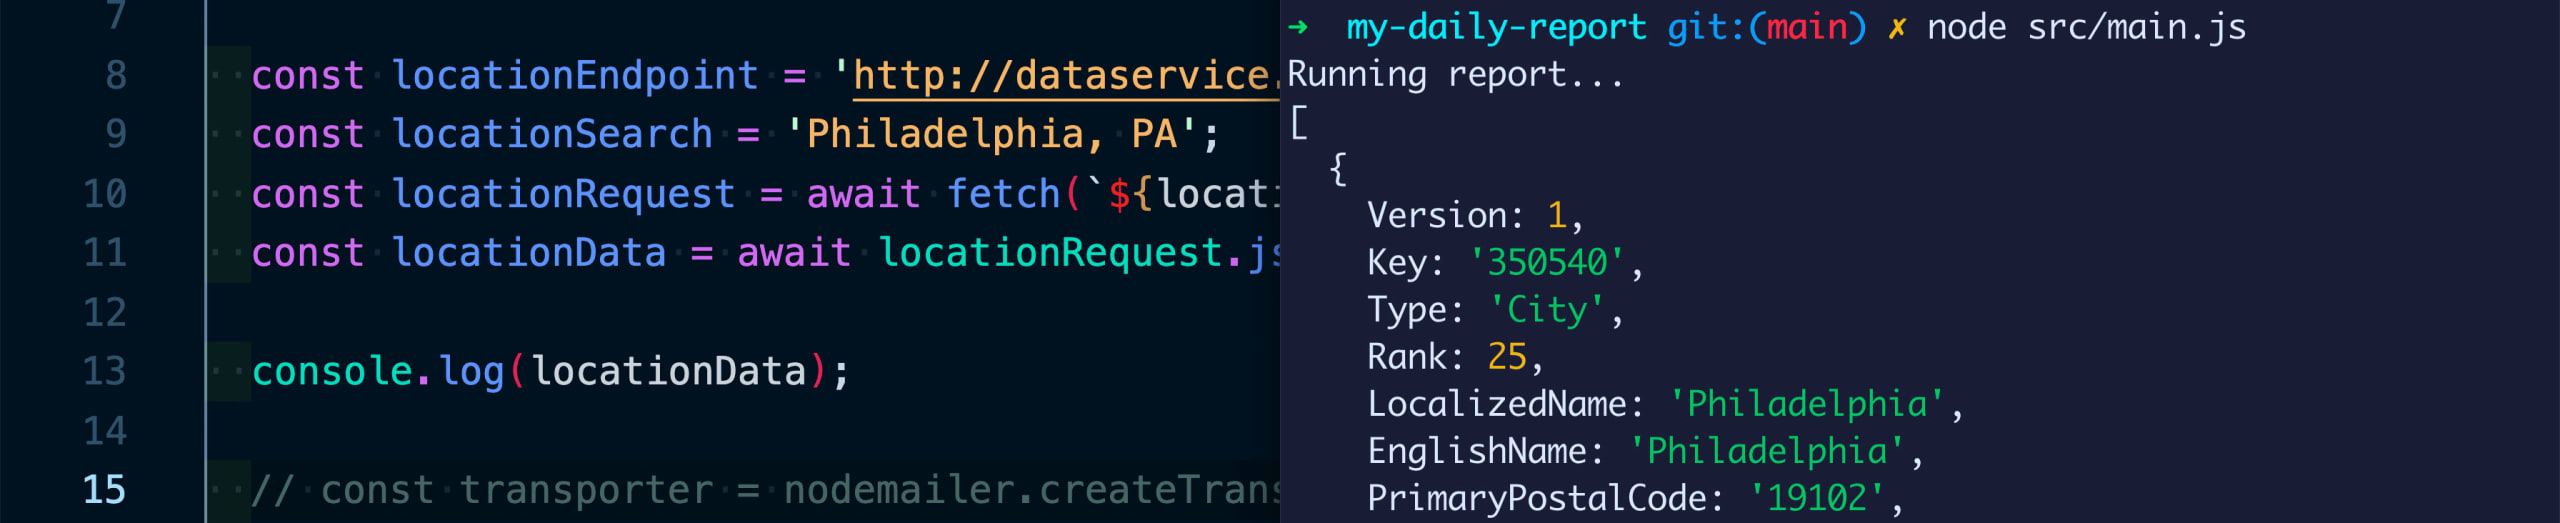
At the top of our run function in src/main.js let’s add:
const city = 'Philadelphia, PA';
const countryCode = 'US';

const locationEndpoint = `http://dataservice.accuweather.com/locations/v1/cities/${countryCode}/search`;
const locationRequest = await fetch(`${locationEndpoint}?q=${encodeURIComponent(city)}&apikey=${process.env.ACCUWEATHER_API_KEY}`);
const locationData = await locationRequest.json();
Note: be sure to update the City and Country code to whatever location you want to use!
If we comment out our mail code and log our results, we’ll notice that the results are an array and in the first object, we can find the property of “key” which is exactly what we want.
So we can additionally grab our location key by adding another line to grab the first result from the array and the key:
const locationKey = locationData[0].Key;Next we want to grab the forecast itself, so we can use our new Location Key to make our request:
const forecastEndpoint = `http://dataservice.accuweather.com/forecasts/v1/daily/1day/${locationKey}`;
const forecastRequest = await fetch(`${forecastEndpoint}?apikey=${process.env.ACCUWEATHER_API_KEY}`);
const forecastData = await forecastRequest.json();
Now if we similarly log out the data like we did the location, we can see our forecast results.

While there’s a bunch of information here we can use, there are a few things that probably make the most sense:
- The headline text
- The first result of Daily Forecasts (there should only be one)
- Daily Forecast Temperature Min and Max
So we can update our Daily Report to include all of that information:
await transporter.sendMail({
    from: process.env.DAILY_REPORT_FROM,
    to: process.env.DAILY_REPORT_TO,
    subject: 'Daily Report',
    text: `
Daily Report

Weather
- Forecast: ${forecastData.Headline.Text}
- Temp Min: ${forecastData.DailyForecasts[0].Temperature.Minimum.Value}° ${forecastData.DailyForecasts[0].Temperature.Minimum.Unit}
- Temp Max: ${forecastData.DailyForecasts[0].Temperature.Maximum.Value}° {forecastData.DailyForecasts[0].Temperature.Maximum.Unit}
    `,
    html: `
      <h1>Daily Report</h1>
      <h2>Weather</h2>
      <p>Forecast: ${forecastData.Headline.Text}</p>
      <p>Temp Min: ${forecastData.DailyForecasts[0].Temperature.Minimum.Value}° ${forecastData.DailyForecasts[0].Temperature.Minimum.Unit}</p>
      <p>Temp Max: ${forecastData.DailyForecasts[0].Temperature.Maximum.Value}° {forecastData.DailyForecasts[0].Temperature.Maximum.Unit}</p>
    `,
  });
We’re including everything right inside both our Plain Text version and our HTML version to make sure our Report is readable no matter which version is read.
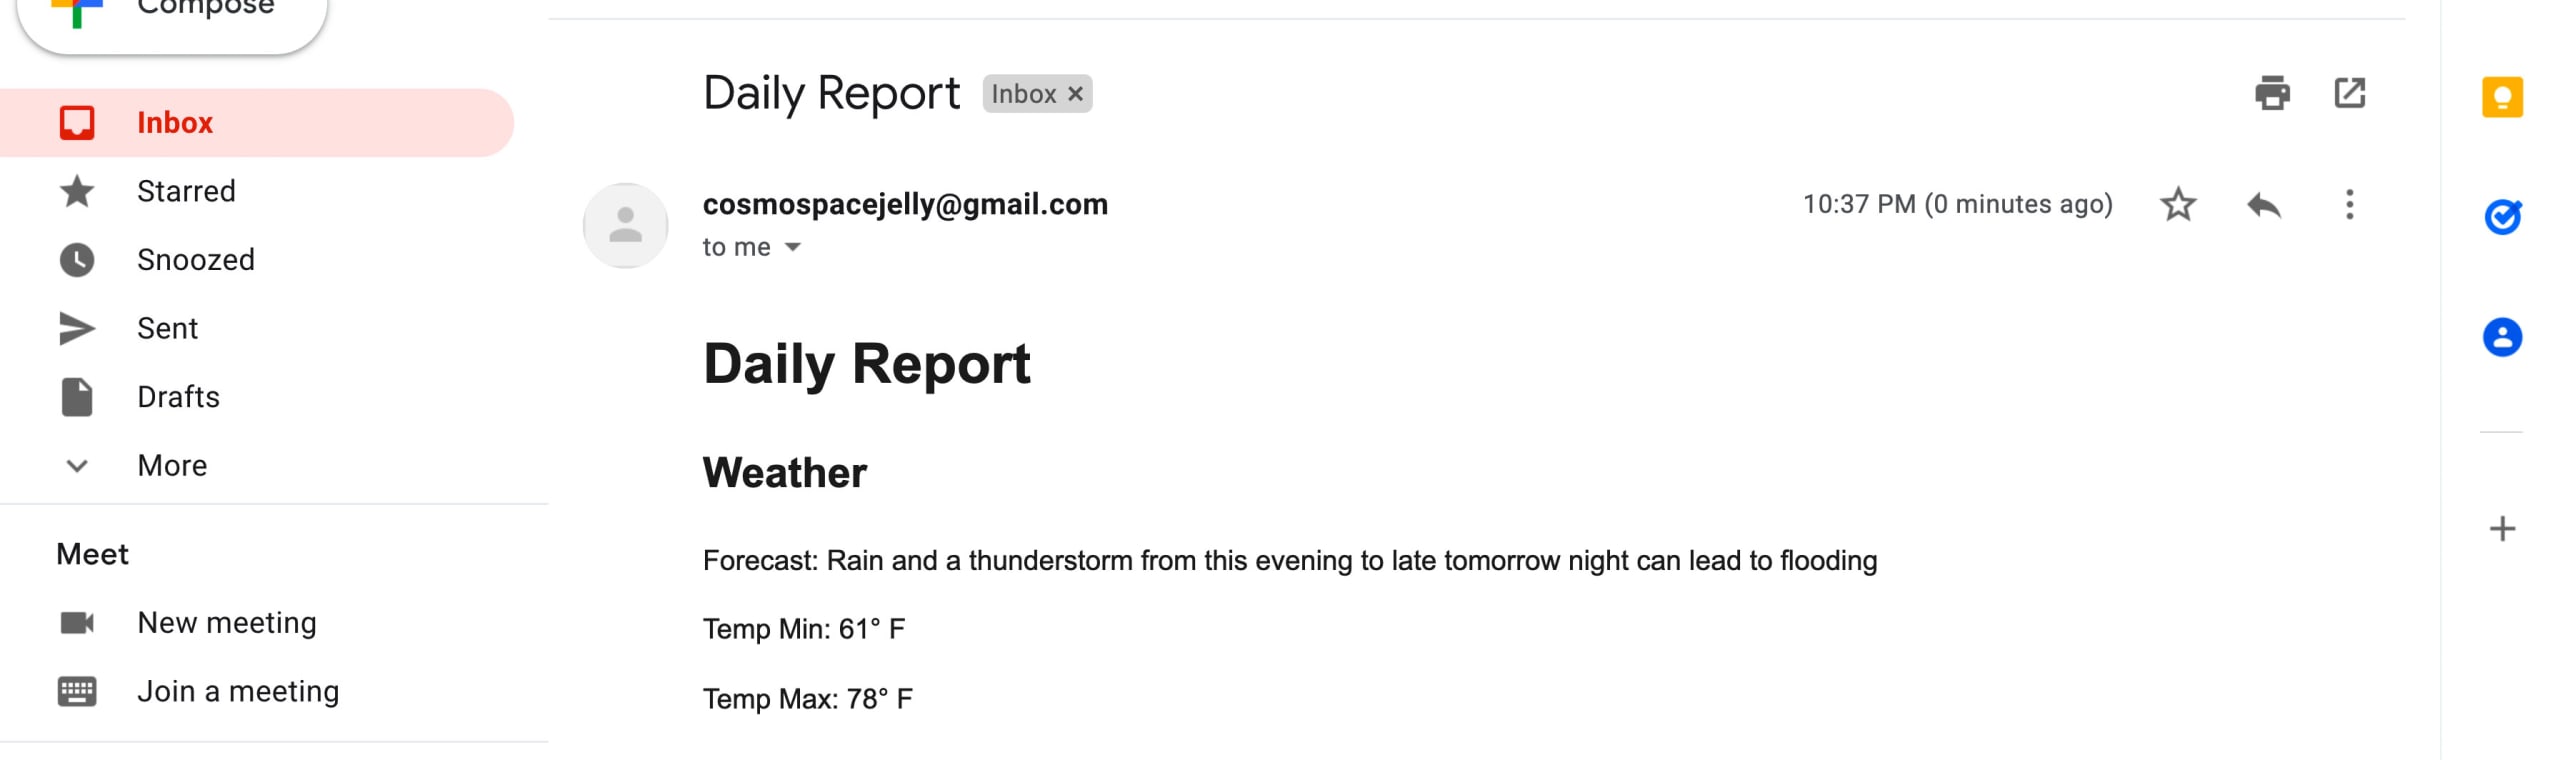
Now when you push this out to GitHub, we can manually run our Workflow, and once our script runs, we should now see our updated Daily Report in our inbox!
Step 4: Using the Tenor API to add a Gif of the day
Finally in order to add a bit of fun to our Daily Report, we can add a Gif using the Tenor API.
Particularly, we’re going to grab the first trending result returned by the API.
To do this, similar to AccuWeather API, we’ll need an API key with Tenor which you can grab by:
- Signing up for a free Tenor account
- Creating a key to use the Tenor API
Tip: want to see how to do this step-by-step? Check out the video version for the complete walkthrough
And again like AccuWeather in Step 3, we want to add this key as an environment variable.
First we’ll add it in .env:
TENOR_API_KEY="abcd1234"Then we’ll add it to our Action workflow file:
env:
  ...
  TENOR_API_KEY: ${{ secrets.TENOR_API_KEY }}
And we’ll want to add it inside of our repository as a GitHub Secret.
Next we can now actually make a request to the Tenor API.
For our Gif we’ll use the Trending endpoint so every day we get a new good Gif.
Inside src/main.js after our weather request, let’s request our gif:
const gifEndpoint = `https://g.tenor.com/v1/trending`;
const gifRequest = await fetch(`${gifEndpoint}?contentfilter=low&limit=1&key=${process.env.TENOR_API_KEY}`);
const gifData = await gifRequest.json();
This will get us 1 trending Gif and make sure it has a low content filter to keep things PG-13.
If we add a console.log and comment our our mail code like before, we can see what our data looks like.

So now we can add that as an image right to our report.
In particular, we’ll use the tinygif option available under media to avoid sending way too big of an image for the reader to load.
Add the following to the end of the Plain Text email:
Daily Gif: ${gifData.results[0].url}And add the following to the end of the HTML email:
<p><img src="${gifData.results[0].media[0].tinygif.url}" /></p>Finally, we can now push our Tenor code up to GitHub, run our Action workflow manually, and we should now see our Daily Report with a Gif of the day!

What else can we do?
From here we have a lot of options, most of them depend on what you want to include for your Daily Report, aside from a Gif.
Add upcoming launches from SpaceX
If you’re a space nerd, maybe you want to know about all of the upcoming SpaceX launches. Good news, is we can use the SpaceX GraphQL API to do just that!
You can find the API at: https://api.spacex.land/graphql/
And if you want to learn how to make the request, you can check out How to Fetch GraphQL Data in Next.js with Apollo GraphQL for inspiration.
Use a different email provider to send the emails
Gmail is convenient, but it could be helpful to use a traditional email provider so you can send your emails from a custom domain.
Check out How to Send Emails with SendGrid and Next.js Serverless Functions for a Contact Form.
Turn your report into a published GitHub Action
While you need to configure a few more things, you can extend your report and turn it into a GitHub Action that can be used by anyone.
Check out How to Create a Custom GitHub Action with Node & JavaScript.